


Skip to content

NOVA Acoustics

Visit Songbird Acoustic Panels

How to Install Resilient Bars

Resilient bars allow secure fixing of plasterboard or other boards to timber joints while improving the acoustic insulation of walls or ceilings.

When properly installed, they allow the wall or ceiling to flex slightly, which absorbs sound.

But if they are incorrectly installed and boards of the wall or ceiling can’t move, there will be no benefit. This is true whether the insulating material is mounted behind the boards or not.

Resilient bars are made of thin galvanised steel with a corrugated web to which plasterboard is attached with screws. Along the bottom is a narrow flange with slots for fixing to timbers. The bars can be trimmed easily with a hacksaw or tinsnips.

Flange mounting on battens or joists

On walls, fix the resilient bars to the battens every 600mm, horizontally from floor to ceiling, by the narrow fixing flange. Ensure the screw is affixed at the bottom of the bar so the weight of the plasterboard will then draw it away from the frame, creating a gap.

With ceilings, fix the bars every 400 to 450mm across the joists from wall to wall and around the edges of the room. If you’re adding resilient bars and an extra layer of board to an existing ceiling, screw 50mm battens to the existing ceiling every 600mm at right angles to the joists first. Make sure the battens are secured to the joists, not the existing ceiling boards.

Use drywall screws or self-tapping screws to fix the bars to the timber framework, whether it’s battens, joists or studwork.

Fitting the plasterboard

Use a double layer of high density acoustic plasterboard, at least 12.5mm thick.

Fix the first layer of boards to the bars with self-tappers of the right length to go into the resilient bars (note: NOT the timber framework), but not so long as to touch the timbers. Stagger all joints and cover the whole wall or ceiling except for 3mm gaps at the outside edges.

Then add the second layer, overlapping the joints and using longer screws that will go through both two layers and into the web of the resilient bars, but again without being so long that they reach the timbers.

Mark the positions of the resilience bars and timbers on the walls to help you ensure that the screws for the second layer hit the bars and not the timbers.

Finishing off

As a final check, before you finish off and decorate, make sure that the wall or ceiling surface flexes slightly. If it doesn’t then the fixings have compromised the movement of the resilient bars. This will probably have been caused by one or more screws having gone into the timber frame or the wall instead of the corrugated web mesh of the resilience bar.

If so, this needs to be resolved before continuing or the wall will not be anywhere near as effective in insulating against noise.

Fill the gaps around the edges with acoustic sealant and smooth off with a caulking tool or filler knife. Then finish off the plasterboard joints in the usual way. Skim if required and then decorate.

NOVA Acoustics Ltd have a published a huge amount of Free Sound Insulation Design Advice here, including soundproofing floor and wall systems, as well as how to approach acoustic detailing and flanking sound. Click through to our Sound Insulation Design Advice section. Or if you need Sound Testing or Consultancy, give us a call to chat with one of our friendly consultants.

Related articles:

Do I simply add mass to Walls and Floors to soundproof?

The Principles of Building Acoustics

Recent posts

thumb 1000 767 0 0 crop 1

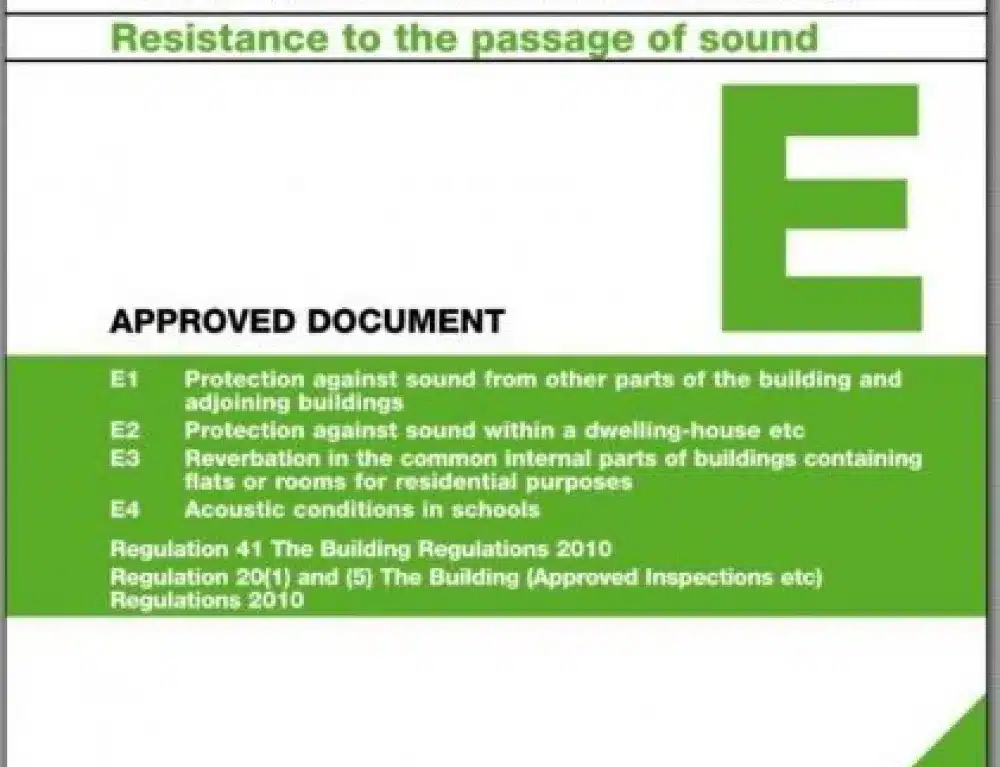
Pre-completion sound testing is the on-site acoustic measurement required to demonstrate that a new residential building or conversion meets Part E of the Building Regulations before it can be occupied. Tests measure airborne sound insulation (through walls and floors) and impact sound insulation (through floors). The pass thresholds for new builds are DnT,w + Ctr ≥ 45 dB for airborne sound and L'nT,w ≤ 62 dB for impact sound; for conversions, 43 dB and 64 dB respectively. Testing must be carried out by an accredited body: NOVA Acoustics holds UKAS accreditation (No. 8568) for sound insulation testing. If a test fails, building control sign-off cannot be granted until remediation is completed and a passing re-test is achieved.
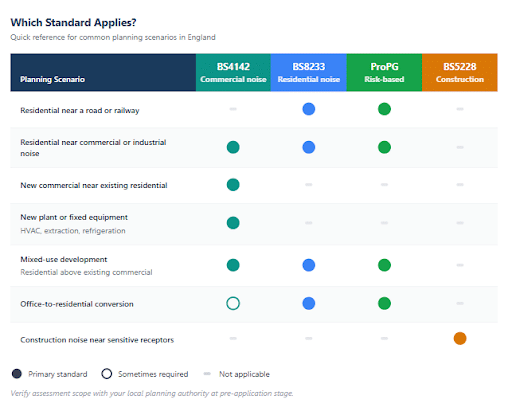
standards that deliver NPPF compliance

The National Planning Policy Framework requires planning authorities in England to consider noise as a material planning consideration. It does not set noise limits. Instead, it establishes the policy principles that govern when noise assessments are required, how significance is determined, and what mitigation is appropriate. The two most important principles for developers are the agent of change principle (the party introducing a noise-sensitive use near a noise source bears responsibility for managing the acoustic consequences), and the requirement to avoid placing noise-sensitive development in high-noise locations unless unacceptable impacts can be adequately mitigated. In practice, NPPF noise policy is implemented through technical standards including BS4142 and BS8233, and professional guidance including ProPG.

thumb 1000 767 0 0 crop 5

BS8233:2014 is the British Standard used to assess whether residential development near roads, railways, or other noise sources can achieve acceptable internal and external noise levels for future occupants. It sets out criteria for bedrooms, living rooms, and gardens across daytime and night-time periods. The most commonly referenced targets are 35 dB LAeq during the day and 30 dB LAeq at night for bedrooms. A BS8233 assessment is almost always required for residential planning applications in noise-sensitive locations, and is often conditioned by the local planning authority. ProPG (2017) sits alongside BS8233 and provides professional guidance on how assessments should be scoped and presented. This guide covers both.